
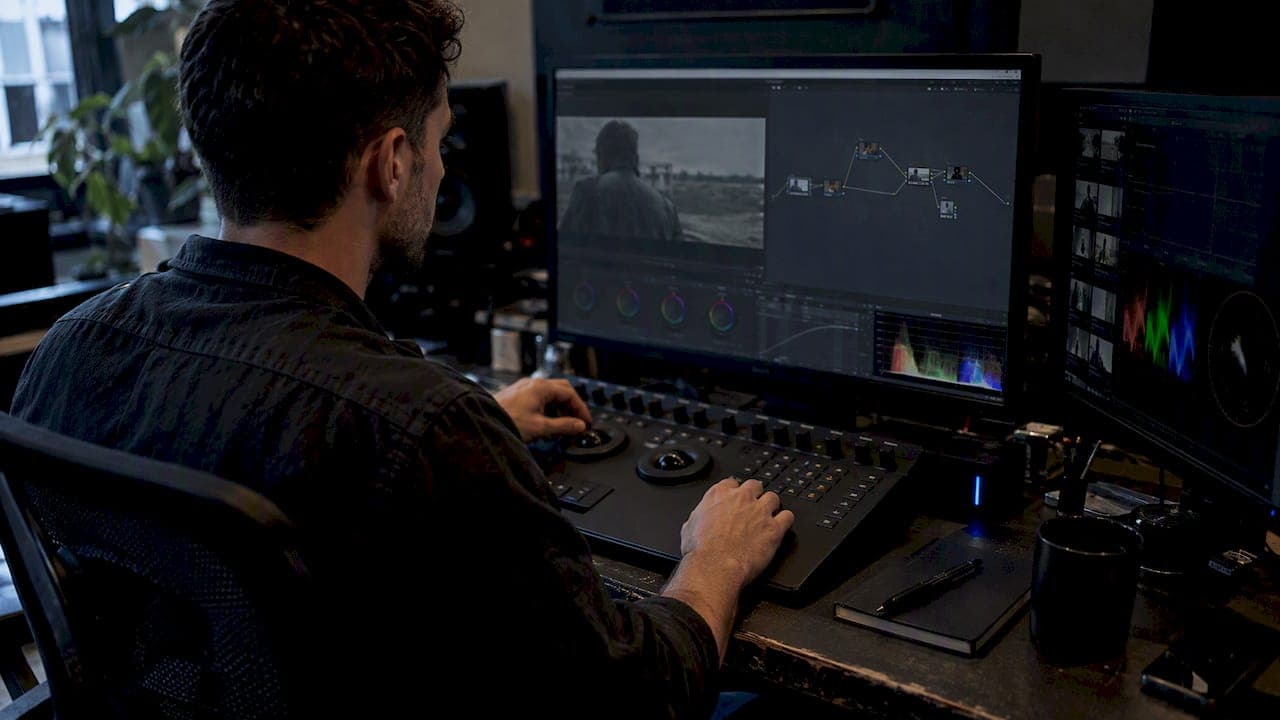
A film-look LUT is a 3D color transform that remaps the hue, saturation, and tone of your footage toward the look of a specific film stock or style, built on standards like Rec.709. It gives you a fast starting point, but it cannot encode grain, halation, or other spatial effects that move over time. Your next step: download a free LUT pack and drop it onto its own node on a calibrated Rec.709 monitor before you judge the result.
TL;DR:
- Before downloading, confirm the LUT expects your camera’s input color space and check whether its license allows commercial use or requires attribution.
- Normalize log footage to a standard color space before applying the LUT on its own node, then adjust its strength rather than accepting full output.
- Calibrate the monitor to the delivery target, control room lighting, and check several shots with waveform and vectorscope, especially for consistent skin tones.
- A .cube file carries color and tone mapping, not grain or halation, so add those effects separately and keep them outside exported monitoring LUTs.
Table of Contents
- Where to find free film-look LUTs worth downloading
- How to apply a film-look LUT correctly in your grade
- LUT formats and what each one can actually represent
- Setting up your monitor before you trust any LUT
- A node-by-node recipe for a believable film look
- Installing, exporting, and sharing LUTs across your team
- What matters more than the LUT you pick
- Brix36: one-tap film looks without a subscription
- FAQ
- Sources
Where to find free film-look LUTs worth downloading
Most editors do not need to build a LUT library from scratch. A handful of curated sources cover the common needs: film emulation, Rec.709 conversion, stylized creative looks, and on-set monitoring cubes.
- Film emulation packs that mimic stocks like Kodak Portra or classic cinema negative tend to show up in large curated collections, including free cinematic LUTs gathered from working colorists and filmmakers.
- Rec.709 conversion LUTs convert log footage (S-Log, V-Log, Log-C) into a viewable gamma 2.4 image, useful as a base layer before any creative grade.
- Creative stylized LUTs push saturation and contrast for a specific mood: teal-and-orange, desaturated noir, or bleach-bypass style treatments.
- On-set monitoring cubes are built for quick reference on a director's monitor, not for final delivery, so they are usually lighter and faster to apply.
- Tutorial roundups, like a film emulation LUT comparison, show before-and-after examples that help you judge a pack before committing time to it.
Most free packs ship as .cube files, with some newer collections including CLF variants for ACES-based pipelines. Check the license on each download page: some packs restrict commercial use or require attribution, and a few are personal-use only. Before applying anything, confirm the LUT's intended input color space matches your footage; a LUT built for Rec.709 input will distort log footage that has not been normalized first.
Pro Tip: Keep a short-list of three or four LUTs you trust rather than hoarding dozens; familiarity with a smaller set speeds up decision-making on set and in the edit bay.
How to apply a film-look LUT correctly in your grade
A LUT works best as one step in a sequence, not a single click that finishes the shot. Treat it as a starting point you refine, not a final answer.
- Normalize your footage first. Apply an input transform or color management setting (Resolve's input color space tools work well here) so log footage sits in a standard gamma before any LUT touches it.
- Place the film-look LUT on its own dedicated node. DaVinci Resolve supports applying LUTs at different points in the pipeline or attaching them directly to a node, which keeps the effect isolated and easy to adjust or remove later.
- Add nodes before and after the LUT node: one for exposure and white balance correction, one for final polish and secondary adjustments.
- Fine-tune with a blend or key opacity control, plus saturation and hue pivots, rather than relying on the LUT's full-strength output.
- Check your vectorscope and waveform monitor across several shots from the same scene to confirm the look holds up consistently, especially on skin tones.
Pro Tip: Pull up a shot with visible skin tone early in the process. If the LUT pushes skin off the standard vectorscope cluster, dial back strength before changing anything else.
For a deeper look at balancing footage before the LUT stage, our LUT color grading guide walks through correcting footage first and then adjusting LUT strength to suit the image.
LUT formats and what each one can actually represent
Not every LUT format behaves the same way, and knowing the differences saves you from guessing why a look falls apart in a different app.
- .cube files are the most common 3D LUT format, available in different grid sizes; denser cubes can offer finer gradient precision, while smaller cubes may suit quick previews.
- CLF (Common LUT Format) and DCTL show up more in ACES-based pipelines or scripted transforms, giving colorists more control than a static cube when a look needs to adapt to different scene conditions.
- Camera manufacturer look files, like ARRI's ALF4 and ALF4c, function as log-to-log creative transforms separate from the display render transform, and exporting them into a standard 3D LUT requires attention to source and target color space.
- None of these formats can carry grain, halation, glow, or any time-varying behavior. Those effects live in separate node-based tools, not inside the LUT itself.
Setting up your monitor before you trust any LUT
A LUT can look convincing on an uncalibrated laptop screen and fall apart on a reference display, so calibration comes before judgment.
- Calibrate your monitor to the standard your deliverable targets, such as Rec.709 Gamma 2.4 for broadcast or web delivery.
- Dim and control room lighting, since ambient light shifts perceived contrast and saturation on any screen.
- Set a reference 18% gray card in frame when possible, then check skin tone patches against the waveform and vectorscope.
- Run a basic sanity check against known reference coordinates; measurement-driven validation against standards like CIE 1931 and ΔE2000 tolerances gives you a repeatable way to confirm a look matches intent rather than guessing by eye.
A node-by-node recipe for a believable film look
Stacking the right nodes in the right order turns a flat LUT into something that reads as filmic rather than filtered.
- Start with an exposure and white balance node to normalize the raw image.
- Add an input transform or normalization node to bring log footage into a standard color space.
- Place the film-look LUT on its own node, isolated from everything else.
- Follow with a power grade or curve node for scene-specific tonal shaping.
- Add a grain node to reintroduce the organic texture a LUT cannot carry.
- Layer halation or glow on highlights, since this is also something a 3D LUT cannot replicate.
- Finish with your output transform matched to the delivery standard.
Keeping the LUT isolated on its own node means you can export it later for on-set monitoring, though anything spatial, like grain or halation, will not travel with that export.
Pro Tip: When exporting a LUT from a node tree for a director's monitor, check Resolve's "3D LUT compatible" option in Film Look Creator so you only export what a LUT can actually carry.

Installing, exporting, and sharing LUTs across your team
Getting a LUT into your software and keeping it organized matters as much as picking the right one.
- Drop
.cubefiles into Resolve's LUT folder (or your app's equivalent) and refresh the LUT list to make them appear in the node menu. - Choose a denser grid when precision matters for subtle grades, or a smaller grid when file size and load speed matter more.
- Keep a shared, version-labeled folder for team LUT packs so everyone grades from the same reference file, not an outdated copy.
If you need to spin up quick test footage to try a new LUT pack before a real shoot, a tool like Carvia's video maker can help you generate sample clips fast.
What matters more than the LUT you pick
Most of the frustration with film-look LUTs comes from expecting a single click to finish the job. A LUT gets you partway there, but believable results come from running the same LUT across several shots and deliverables, checking it against scopes, and adjusting before you commit. The one-tap convenience is real and worth using, just pair it with a quick pulse check on a reference display instead of trusting the first preview.
— simeon
Brix36: one-tap film looks without a subscription
If building node trees and calibrating monitors sounds like more color science than your project needs, we built Brix36 around one-tap production controls instead. You pick a style and we apply it across your project without asking you to manage nodes, LUT formats, or scopes yourself.

- We charge pay-as-you-go credits, so you spend only on the projects you actually produce, never a recurring subscription.
- Our short film tools and AI music video workflow support visual media production.
Check credit pricing and start your first project today.
FAQ
Can I use the same film-look LUT in Resolve, Premiere, and Final Cut?
Most .cube LUTs work across DaVinci Resolve, Premiere Pro, and Final Cut Pro, since .cube is a widely supported standard format. Behavior can vary slightly between apps depending on where in the pipeline the LUT gets applied, so always check the result on a calibrated monitor after import.
Do film-look LUTs work on log footage directly?
Applying a film-look LUT straight to unconverted log footage usually produces washed-out or oversaturated results, because most LUTs expect a normalized input color space. Convert or normalize your log footage first with an input transform, then apply the LUT on its own node.
What is the difference between a LUT and a custom color grade from scratch?
A LUT applies a fixed, pre-built color transform in seconds, while a custom grade built from scratch uses curves, grain, and secondary adjustments shaped around your specific footage. Professional colorists often use a LUT as the starting point and still add custom node work afterward for a credible film look.
Can a LUT replicate film grain or halation on its own?
No, a 3D LUT only performs color and tone mapping and cannot carry grain, halation, or other effects that vary across the frame or over time. Those effects need separate node-based tools added after the LUT in your grading pipeline.
How do I pick a film-look LUT that matches my camera?
Match the LUT's expected input color space to your camera's log profile first, since a mismatch is the most common cause of a broken-looking grade. From there, test the LUT against a skin tone reference on your vectorscope before trusting it across a full project.
Sources
- Videomaker
- Lightillusion
- Ch. 150 Using LUTs
- ARRI - How to create an ARRI Look File 4 - Workflow Guideline