
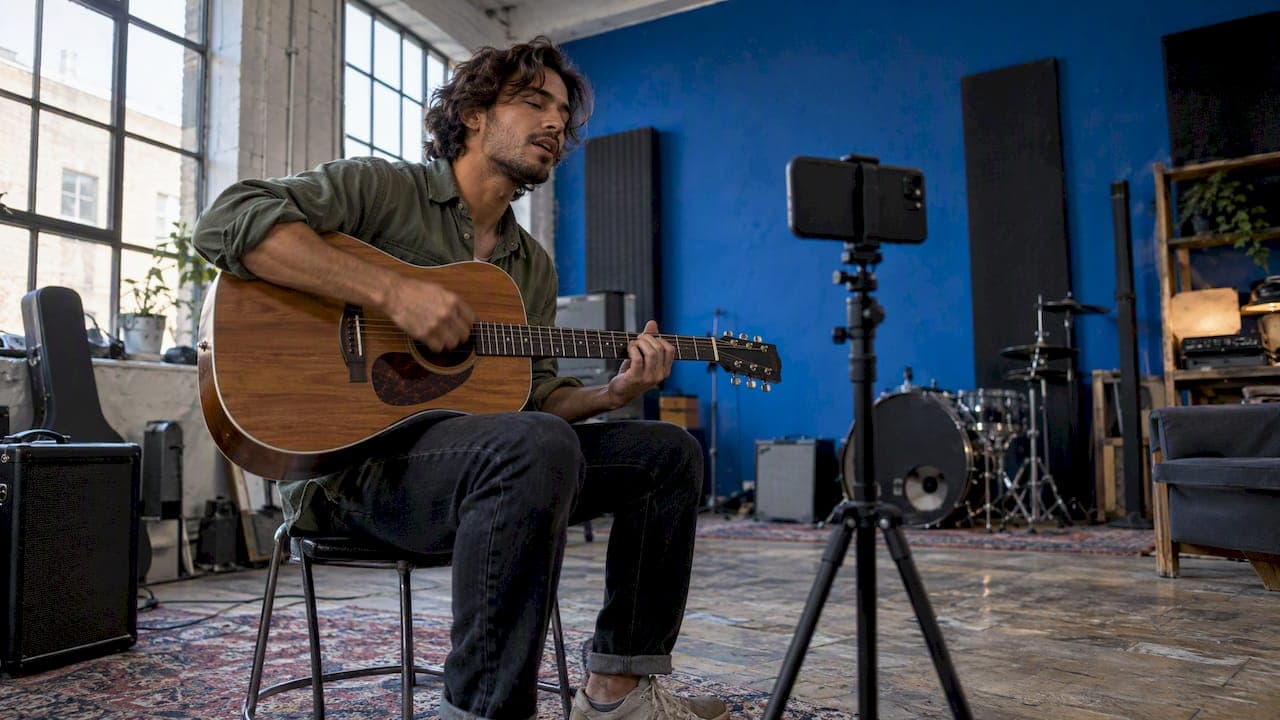
You can make a music video entirely on your phone. Plan it around the song's sections, film it with the phone steady and well lit, play the real track while you perform, edit to the beat, and export in the shape your platform wants. Everything below follows that order, and none of it needs a crew or a camera package.
This guide is for artists, filmmakers and marketers who want a finished video from a smartphone, whether the footage is live action, AI-generated, or a mix of both.
TL;DR
- Plan before you film: a short storyboard built around the song's sections saves more time than any editing trick.
- Steady the phone, light your face, and decide portrait or landscape before the first take.
- Play the finished song while you perform, then lay the master audio under your edit and cut to it.
- Keep effects purposeful: transitions and speed ramps should serve the rhythm, not decorate it.
- If you have no footage, or want a stylized look, generate scenes from your lyrics and combine them with what you shot.
Table of Contents
- What a mobile music video actually is
- Step 1: Plan the video around the song
- Step 2: Film so the phone looks like a real camera
- Step 3: Record to the real track and sync it
- Step 4: Edit to the music
- Step 5: Export and share
- When you do not have footage: the AI route
- Our perspective
- Make yours with Brix36
- A simple one-weekend plan
- Common mistakes and how to avoid them
- FAQ
- Sources
What a mobile music video actually is
A mobile music video is any music video where the phone does the heavy lifting: filming, editing, effects, or all three. Some artists shoot every frame on a phone and finish in a phone editor. Others shoot live action and add generated or animated scenes. Both are legitimate, and viewers on YouTube, Reels and TikTok care about whether the video holds attention, not about the camera body.
If you are still deciding whether the effort is worth it for your release, whether you need a music video at all is a fair question. Our view: a video gives a song a face and a reason to be shared, and a phone makes the cost of trying very low.
The workflow has five stages:
- Plan the video against the song's structure.
- Film with stable, well-lit, well-framed shots.
- Sync audio and video.
- Edit to the music.
- Export and share for each platform.
Step 1: Plan the video around the song
The biggest difference between a video that looks professional and one that looks like a pile of clips is planning. The University of Sydney's phone video guide recommends planning with a script and storyboard, rehearsing, choosing the location, and arriving early to practise before you film. For a music video, your script is the song.
Break the song into sections
Listen to the track and mark where the intro, verses, pre-chorus, chorus, bridge and outro begin. Give each section a job:
- Intro: establish the world, the location or the character.
- Verse: tell the story in quieter, simpler shots.
- Chorus: your biggest, most repeatable image. The chorus returns several times, so you can film it once or twice and reuse variations.
- Bridge: the change. A new location, a new color, a different camera movement.
- Outro: resolve or break the pattern.
Planning by musical bar rather than by clock time keeps your cuts tied to the music if the edit shifts. We walk through that method in our guide to a music video storyboard, and our piece on music video structure covers how to pace sections so viewers keep watching.
Make a shot list you can actually finish
For a three-minute song, aim for a list you can shoot in one or two sessions. A workable shot list has:
- One performance setup (you singing to camera or playing).
- Two or three cutaway shots per section: hands, details, locations, movement.
- One signature visual you repeat, such as a color, prop or camera move.
Scout your location first. Check where the light falls at the time you plan to film, and arrive early to practise, as the Sydney guide advises.
Choose orientation before you press record
The University of Reading's phone-filming guide says to decide orientation before recording: portrait suits social media, while landscape suits YouTube, websites, broadcast and presentations. For a music video this is a real decision. A landscape video is the natural home for a full YouTube premiere. A portrait video is built for short-form feeds, where a 30 to 60 second hook of the chorus may do more for you than the full song.
If you need both, shoot landscape and frame loosely so you can crop to portrait later, or shoot portrait with the final vertical cut in mind. Our vertical video editing workflow covers how to keep faces and action inside the safe area of a 9:16 frame.

Step 2: Film so the phone looks like a real camera
Phone cameras are good enough. What gives amateur footage away is shake, bad light and poor framing. All of these are fixable for free.
Keep the phone still
The Sydney guide says to use a tripod or rest the phone against something. If you must hold it, use both hands and brace your elbows against your body. A small tripod, a stack of books, a wall or a car roof all work. Movement should be a choice: a slow walk toward the camera or a deliberate pan, not a wobble.
Light your subject, not the background
Film in a well-lit environment, think about the composition on screen, and avoid backlighting unless you want a silhouette. That is the Sydney advice, and it holds for music videos. Window light is your best friend: face the window, or put it to one side for a moodier look. Reading adds that low light causes focus hunting, where the camera keeps refocusing and the picture pulses, so give the camera enough light to lock on.
Lock focus and move closer
The Reading guide advises moving closer rather than using digital zoom, stabilising with a tripod, and locking focus by tapping and holding on the subject. Digital zoom just crops the image and softens it. Walk closer instead, or change the shot size by editing later.
Vary your shots
A performance video lives on variety. For each section capture:
- A wide shot to show where you are.
- A medium shot of the performance.
- A close-up of the face, hands or an object.
- A movement shot: walking, turning, a slow push in.
Film each performance take several times, singing along the whole way through. You will choose the best moments in the edit.
For more on getting a cinematic feel from a handset, see our guide to mobile filmmaking, and if you are stretching this into a story piece, our walkthrough of a mobile short film.
Step 3: Record to the real track and sync it
Music video performers rarely sing live on camera. Instead you lip-sync or sing along to the finished song, then replace the camera audio with the master.
Play the song while you perform
Play the track through a speaker so you can perform to it and the camera can hear it. That scratch audio gives your editor a waveform to match against the master later. One tutorial on making a music video solo recommends exactly this method, so the takes can be synced afterward in an editor such as DaVinci Resolve. Turn the speaker up loud enough that the phone picks it up, but not so loud that it distorts.
Use the clap trick
If you also want separate audio, say a talking section or ambient sound, the Sydney guide suggests recording on a second phone placed closer to the subject and clapping at the start. The clap shows up as a sharp spike in both recordings, so you can line them up exactly.
Start every take the same way
Start the playback, wait a beat, then clap or give a clear cue before you perform. Consistent starts make your life easier when you have twenty takes and need to find the matching point in each.
Step 4: Edit to the music
Start the edit by importing the master audio and laying it down first. Every cut then answers to the track. Build the timeline in this order:
- Place the master track. Mute the original camera audio on all your clips. Your scratch audio has done its job once you have synced the picture.
- Sync the performance. Line up each take against the master using the waveform or the clap.
- Rough cut by section. Drop the best take of each section in place before adding anything else.
- Add cutaways. Cover weak moments and add rhythm with your close-ups and movement shots.
- Tighten to the beat. Nudge cuts so they land on kicks, snares or lyric changes.
- Color and polish. Match brightness and color across clips, then add titles.
Many phone editors offer automatic beat detection, which drops markers on the beat so you can snap clips to them. It is a fast way to get a first pass. Then walk through the video and fix the cuts by hand that feel off.
Keep effects honest
Speed ramps, flashes and transitions are tempting. Hollyland's creator guide notes you can match the energy of the music with effects, transitions and speed curves, and also warns that unnecessary speed changes or transitions distract the viewer unless they enhance the rhythm or the story. We agree. Choose one or two effects, use them on purpose, and repeat them so they become part of the video's style.
Check the sound, not just the picture
A music video is only as good as the song it carries. If your master still needs work, speeding up your mixing workflow can help you reach a finished version sooner, so the audio under your edit is final before you cut to it. Re-cutting a video because the track changed is the most avoidable waste of time in the whole process.
Adding music to existing footage
If you have footage and just need to put a song under it, most phone editors let you pick a track from a library or from files on your device. MakeUseOf's guide to adding music on iPhone and Android covers the routes, including editing apps and the built-in tools in Google Photos and iMovie. For a proper music video, though, you want your own master, not a library track. Make sure you hold the rights to any song you upload.
Step 5: Export and share
Export settings depend on where the video will live. The practical rules:
| Where it goes | Orientation | Practical export |
|---|---|---|
| YouTube premiere | Landscape (16:9) | 1080p or higher, matching your source frame rate |
| Reels, TikTok, Shorts | Portrait (9:16) | 1080p vertical, a hook-length cut of the song |
| Website or press kit | Landscape | 1080p, full-length version |
The orientation split follows the Reading guide: portrait for social, landscape for YouTube and websites. For frame rate, keep the rate you filmed at. A 24 frames per second look feels more filmic, while 30 is the common choice for general social content, as the Hollyland guide also suggests for standard 1080p social exports.
Two habits protect quality:
- Export from the original files. Do not edit a clip that was already compressed by a messaging app.
- Remember export cannot rescue bad footage. A higher bitrate keeps fine detail, but it cannot repair a blurry or dark recording. Fix the source with better light and focus.
Before you publish, watch the exported file once on your phone with headphones and once on a laptop. Check that the lips match the audio, that the end of the video does not cut the final note, and that the title text is readable on a small screen.
When you do not have footage: the AI route
Sometimes you cannot get a location, a crew, or even the time to film. Or you want visuals you could never shoot: a fantasy world, an animated character, a stylized look that stays consistent from scene to scene. That is where generating the picture from your song makes sense.
Our guide on how to make an AI music video from your song walks through it. The short version: you start from your track and lyrics, split it into sections, and generate each scene to match, then assemble the result. Because the video follows section-based storyboarding, you decide what the verse looks like and what the chorus looks like, the same way you would on a live shoot.
It also combines well with live action. Shoot yourself performing on your phone, then use generated scenes for the bridge, the intro, or the shots your budget could not cover. Mixing the two gives you a video with variety that would be hard to film alone.
Lip sync and lyric videos
If your video needs a character singing the words, AI lip sync music videos are designed to make the mouth follow your lyrics, so you do not have to film yourself in the shot. If you would rather keep the focus on the words, our lyric video tutorial shows how to build one by timing the lyrics before adding vocals or motion.
Our perspective
Most artists we talk to are not short of ideas. They are short of the hours, the money and the technical know-how to get those ideas on screen. A phone solves the camera problem. It does not solve the planning problem, the consistency problem, or the "how do I make this look like a real release" problem.
That is why we built Brix36 around the song itself. Section-based storyboarding lets you map your verse, chorus and bridge to scenes before anything is generated. Artist DNA is designed to keep your look consistent from shot to shot, so the person in the chorus looks like the person in the first verse. One-tap looks are meant to give you a professional visual style without a colorist or a technical background.
We also think the way you pay should match the way you work. Music videos come in bursts: a single, then nothing for a month, then an album rollout. So we use pay-as-you-go credits rather than a subscription. You buy what you need for the project in front of you and spend it as you go.
Our advice is to use your phone for what it does best, which is capturing you, your friends and your real places, and let AI fill the gaps you cannot film. The best videos tend to be the ones where both halves are working for the song.
simeon
Make yours with Brix36
If you want to turn a track into a finished video without a shoot, Brix36 is built for it. You can start from your song, plan it section by section, give your visuals a consistent look with Artist DNA, and generate the scenes, all on a credit system where you pay for what you produce. See how credits work and what they cover, or go straight to the music video creator.

If your idea is closer to a story than a performance, the same approach works for a short film made with Artist DNA.
A simple one-weekend plan
If you want to finish a video quickly, here is a realistic schedule.
Evening before: Finalize the master. Mark the song sections. Sketch a storyboard with one image per section.

Day one, morning: Scout the location and set up your tripod. Film the performance takes for every section, three or four passes each, playing the track through a speaker.
Day one, afternoon: Film cutaways: details, movement, wide shots. Capture a few extra seconds before and after every shot, because editors need room to trim.
Day two, morning: Import the master, sync the takes, and build the rough cut by section.
Day two, afternoon: Tighten cuts to the beat, add color and titles, then export a landscape master and a portrait cut.
Release day: Upload the full video to YouTube and post the vertical hook cut on short-form platforms with the song link.
This schedule works because every decision was made before filming. The edit stays light, since you only need to choose from footage you planned.
Common mistakes and how to avoid them
- Filming without the song playing. You end up with no reference for sync and a performance that does not match the tempo. Always play the track.
- Changing the track after the edit. Lock the master first.
- Shooting everything handheld. A little shake reads as energy. Constant shake reads as amateur. Use a stable base for most shots.
- Overusing effects. One recurring effect looks like style. Ten look like noise.
- Ignoring the first three seconds. On social feeds, open with your strongest image or the hook of the song, not a logo.
- Forgetting the safe area. Text and faces at the very edge of a vertical frame get covered by platform buttons. Keep them inside the center.
FAQ
Can I make a music video with just my phone?
Yes. A phone can film, edit and export a complete music video. The result depends more on planning, steady shots and good light than on the device. A storyboard built around the song's sections and a tripod or stable surface do the most to improve it.
How do I add my song to a video on my phone?
Import the clip into a phone video editor, add your audio file as a track, and mute the original camera sound. Most editors let you pick music from your device or a library. Line up the picture against the master using the waveform or a clap at the start of the take.
Should I film my music video in portrait or landscape?
Choose based on where it will be watched. Portrait suits social media, and landscape suits YouTube, websites and presentations, according to the University of Reading's phone-filming guidance. If you need both, plan the framing in advance so one shoot can serve two cuts.
Can I make a music video without filming anything?
Yes. You can generate scenes from your song and lyrics, then assemble them into a finished video. Many artists combine generated scenes with a few phone-shot clips to get variety. Our guide to making an AI music video shows the process step by step.
Sources
- Smartphone Video Production, University of Sydney
- Filming on Your Phone, University of Reading
- How to Make a Music Video with Step-by-Step Editing, Hollyland
- How to Make a Music Video on Your Own, Nathan Duffy
- The Easiest Ways to Add Music to Videos on iPhone and Android, MakeUseOf
- Do You Need a Music Video, Twisby Records
- Speed Up Mixing Workflow Techniques, Aubiomix